
Custom patches have become a cornerstone of branding, team spirit, and personal style, turning logos into durable, wearable art. This guide introduces how to bring a concept to finished patches, from idea through the patch production process. You’ll explore patch design ideas, choose materials and backing, and weigh embroidery versus printing to fit your goals. With practical tips, you’ll learn to balance detail, durability, and cost whether you choose embroidered patches or printed patches, so that the final pieces align with your brand. From choosing a supplier to the production timeline, understanding the custom patch manufacturing pipeline helps ensure quality.
Think of these wearable branding elements as fabric badges, logo patches, or emblem patches that carry your story onto garments. LSI principles encourage using related terminology—fabric badges, embroidered emblems, and printed surfaces—to describe the same idea from different angles. The journey moves from artwork to production, covering materials, backing options, finishing touches, and durability considerations. Using diverse terms helps teams compare suppliers, manage expectations, and ensure consistency with brand guidelines across products.
From Concept to Brand Identity: Defining Custom Patches That Communicate Your Message
To create patches that truly represent your brand, start by defining the core concept and goals of the project. Identify who will wear or use the patches, what message the logo or artwork should convey, and whether the patch will serve as a standout feature or a subtle branding accent. Clarifying these points helps determine patch size, shape (round, shield, or custom cut), color palette, and the level of detail achievable with embroidery, weaving, or printing within your production constraints.
A well-defined concept also guides practical choices like backing and application. For heavy-wear items such as jackets, a durable merrow edge paired with an iron-on backing might be ideal, while boutique fashion lines could favor a sew-on finish for a premium look. Framing your goals early reduces redesigns and accelerates the overall patch production process, ensuring the finished product aligns with your brand strategy.
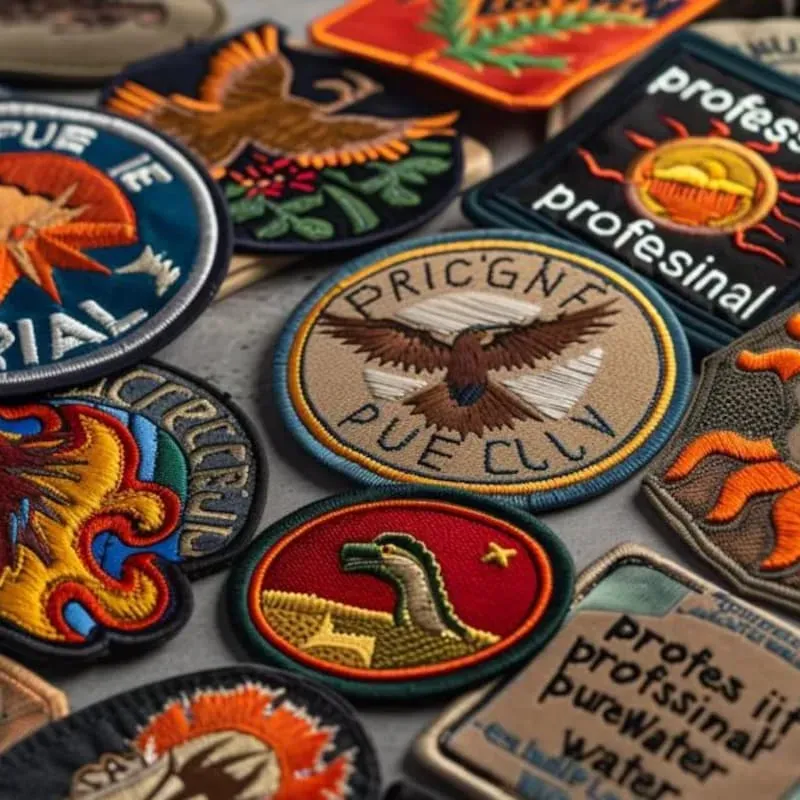
Patch Design Ideas and Style Options: Embroidered, Woven, and Printed Paths
Design ideas for custom patches span several textures and techniques. Embroidered patches are classic and durable, using thread to form crisp lettering and logos, with embroidery often excelling in high-contrast or bold designs. Woven patches offer tighter detail and a softer finish, making them ideal for intricate logos and multicolor work where embroidery might appear too textured.
Printed patches capture photo-like imagery and gradients that embroidery can’t easily reproduce, and dye-sublimation patches are excellent for full-color artwork on polyester bases. Consider edge finishes such as merrow borders for durability or laser-cut edges for a modern silhouette. When selecting a style, balance the design’s complexity with production practicality to maintain clarity at smaller sizes while staying faithful to your patch design ideas.
Materials, Methods, and Backing Options for Quality Patch Manufacturing
Material choices determine the patch’s durability, feel, and suitability for different garments. Common threads include polyester for colorfastness and wash durability, with rayon offering a softer sheen. Substrates like twill, felt, and satin influence how colors read on fabric, while backings (iron-on, sew-on, Velcro) affect ease of use and longevity.
The patch production method you choose—embroidery, weaving, or printing—drives tooling, setup, and cost structure. This is where “custom patch manufacturing” decisions come into play: you’ll weigh detail versus durability, weight versus flexibility, and the total cost per unit across MOQs. A knowledgeable supplier can help balance these factors to preserve your design intent and brand standards.
Prototyping, Color Matching, and Proofing for Accurate Reproduction
Prototyping is essential to prevent expensive redesigns later. Start with digital proofs to verify layout, font choices, and color separations before any physical patch is produced. For embroidered and woven patches, request physical swatches or soft proofs that reflect actual thread colors and fabric textures to confirm how the patch will appear in real life.
Color matching becomes critical when threads or inks read differently in person than on screen. Test legibility at the intended sizes by checking line weights and density, and consider a protective coating or backing for patches intended to endure washing or outdoor use. This phase ensures that the final patch aligns with your expectations and your brand’s visual language.
The Patch Production Process: From Prototype to Large Batch
Understanding the patch production process helps set realistic timelines and budgets. After design approval, tooling and setup prepare machines, dye lots, and backing materials, defining lead times and MOQs. A production-grade sample is then produced for final verification before a full run begins.
During the production run, patches are manufactured using the selected method (embroidery, dye-sublimation, or other printing techniques). Quality control checks catch defects early, and finishing steps—edge treatment, backing application, and packaging—prepare patches for shipment. Planning for staggered production can also help manage inventory and cash flow for larger campaigns.
Quality Control, Durability, and Compliance for Longevity
Quality control ensures consistency in stitch coverage, density, colorfastness, and backing performance. Patches should withstand repeated washing and sunlight exposure without fading or fraying, and edges should maintain their integrity whether sew-on or iron-on methods are used.
Safety and regulatory compliance are important, especially for products used by children or in regulated environments. Verify materials meet applicable standards, and provide clear care instructions to end-users. Finishing touches and proper packaging further enhance durability and perceived value, reinforcing your brand’s commitment to quality in every custom patch.
Frequently Asked Questions
What are custom patches and how do embroidered patches compare to printed patches?
Custom patches are fabric badges created to display a logo or artwork on clothing, bags, or gear. Embroidered patches use thread to build the image, delivering texture and durability; printed patches use ink to reproduce detailed photos or gradients, offering sharp color and softer edges. Both fall under custom patches and can be produced with iron-on or sew-on backing depending on end use.
What is the patch production process for custom patches, from concept to finished product?
The patch production process typically includes concept and goal setting, selecting patch design ideas, choosing materials and backing, prototyping and color matching, tooling and setup, production run, finishing, and packaging. Working with a supplier helps manage MOQs, timelines, and quality checks.
What patch design ideas work best for custom patches?
Effective patch design ideas focus on clear logos, simple silhouettes for embroidery, high-contrast colors, and legible typography. For more detail, consider woven patches or printed patches for gradient artwork, and think about backing, edge finishes, and size constraints early in the design.
Which backing options and materials should I consider for custom patch manufacturing?
Backings include iron-on for quick application, sew-on for durability, and Velcro when you need removable branding. Materials like twill, felt, satin, and different sub-strates affect texture and how colors read. Edge options (Merrow vs laser-cut) also impact durability and look.
How can I ensure color accuracy and quality in the patch production process for custom patches?
Use digital proofs and physical thread swatches to confirm color separations, then perform color matching against Pantone references or thread brands. Prototyping and soft proofs help verify embroidery density, legibility, and how patches look on real fabric before the full run.
What should I expect in terms of cost, MOQs, and timelines for custom patches?
Costs depend on method (embroidered vs printed), quantity, backing, and finishing. MOQs vary by factory and process, and timelines include design rounds, prototyping, and production. Planning ahead with a supplier helps optimize cost and ensure on-time delivery.
| Aspect | Key Points | Notes |
|---|---|---|
| Concept & Goals | – Define purpose, audience, message, and lifespan. – Decide patch size, shape, color palette, and level of detail based on production method. – Consider backing and application (merrow edge, iron-on, sew-on) early to guide design and timelines. |
Early alignment reduces revisions and speeds up production; guides supplier selection and MOQs. |
| Design Ideas & Styles | – Styles: embroidered, woven, printed, dye-sublimation; edge options include merrow and laser-cut. – Design considerations: size/shape, color strategy, branding alignment, backing choice. |
Design choices influence cost, durability, and how detail reads at target sizes. |
| Materials, Methods & Backing | – Threads: polyester vs rayon; metallics. – Substrates: twill, felt, satin. – Backings: iron-on, sew-on, Velcro. – Methods: embroidery, weaving, printing; balance detail, durability, and cost. |
Choose materials to match wear, wash durability, and garment compatibility; coordinate with chosen production method. |
| Prototyping & Proofing | – Digital proofs and color separations; swatches/soft proofs. – Test legibility, stitch density, and color transitions. – Consider protective coatings or durable backing for longevity. |
Prototyping saves time and money; verify appearance on target fabrics and sizes before full production. |
| Production Process | – Tooling/setup; MOQs and lead times. – Sample review and production run. – Finishing, packaging, and shipping. – Plan for MOQs and staggered production if needed. |
Clear scheduling and QC at every stage ensure on-time delivery and predictable costs. |
| Quality & Compliance | – Stitch density, colorfastness, backing performance, dimensional accuracy. – Safety/compliance for kids’ products or regulated items. |
Maintain consistency and meet regulatory requirements to preserve brand integrity. |
| Finishing & Applications | – Edge finishes (merrow vs laser-cut). – Backing protocols (iron-on, sew-on, Velcro). – Attachment versatility and care instructions. |
Final presentation affects perceived value and user experience; provide clear care guidelines. |
| Budget & Timeline | – Design, tooling, MOQs, per-unit costs. – Create a realistic timeline including rounds, prototyping, and production slots. |
Forecast costs and schedule to align with demand and cash flow. |
| Legal & Branding | – Licensing for logos/artwork; color specs and typography; consistent placement across products. | Protect brand integrity and avoid infringement; maintain a unified look across patches. |
| Real-World Tips | – Start with small test runs; work with suppliers offering both design and technical expertise. – Maintain a patch style guide with color codes and allowances. – Explore sustainable options like recycled backing fabrics or low-emission dyes. |
A practical supply chain with clear guidelines reduces revisions and supports scalable growth. |